Content
Background
The most important part of an organisation is its employees. With the Robin Data ComplianceOS® you can record these employees as persons, assign them to specific locations, and assign their function within the organisation.
Persons are not automatically users of the system
As a rule, only those users who are part of the data protection organisation interact with the Robin Data ComplianceOS®. However, it may be useful to create additional persons in the Robin Data ComplianceOS®. For example, in a later version, the Robin Data ComplianceOS® will include a training module that will allow training to be started and managed based on the persons in the organisation.
Those persons are therefore not automatically users with access to the Robin Data ComplianceOS®. If you want to make a person a user, you must create a user account for the person. This can be done by the administrator under Organisation Management > Users.
Manage persons
- In the main menu click on Organisational data: A dropdown menu opens.
- Move the mouse pointer over the menu item Organisation: Another dropdown menu opens.
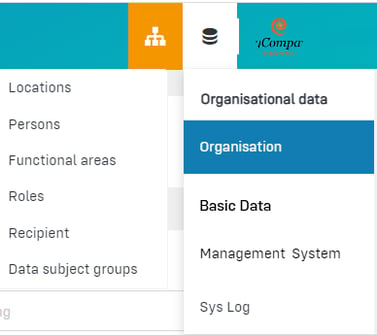
- In the second dropdown menu click on Persons: The table view opens.
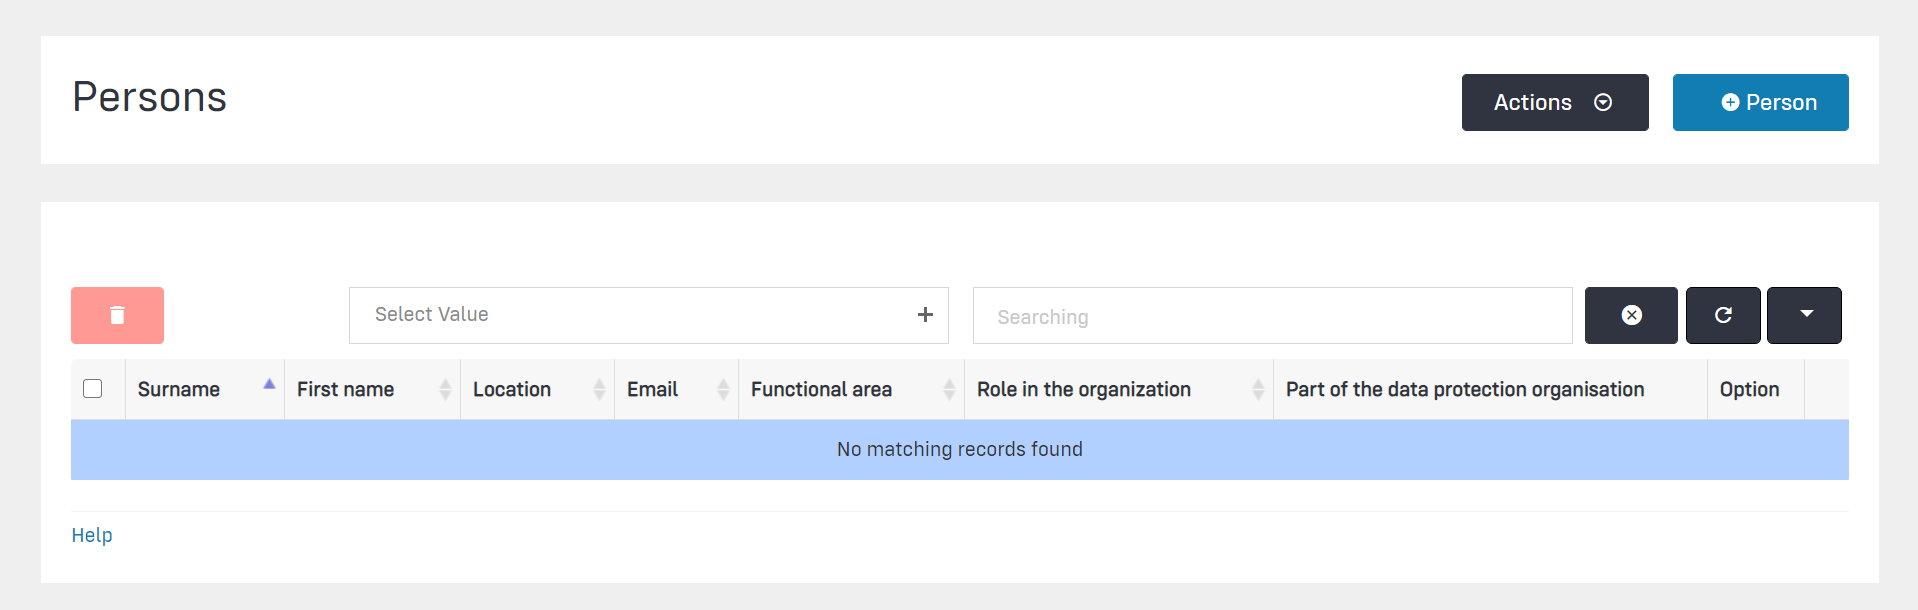
The general functionality of the table view is described in the article Using the table view.
Click to enlarge image
In the table view you can see the overview of the currently already created persons.
Import persons
You can import CSV files with information about people. This information is automatically entered in the table as persons. Use the Importer for this purpose.
- In the main menu click on Organisational data: A dropdown menu opens.
- Move the mouse pointer over the menu item Organisation: Another dropdown menu opens.
- In the second dropdown menu click on Persons: The table view opens.
- Click on the button Actions: A dropdown menu will open.
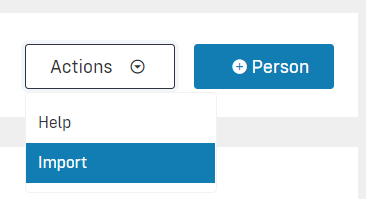
- Select Import: The importer opens.
- Either click on the button Select file or in the area marked in red to upload the CSV file:
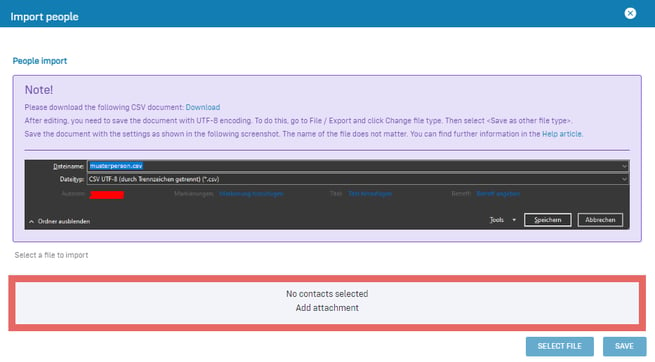
- Click on Save: The import will be completed and the imported persons will be saved in the table.
Create persons
Note on change of email addresses
New users of the Robin Data ComplianceOS® can be created from existing persons. Therefore, the email addresses must already be stored correctly at this point. A later change of the email address is not possible.
If you only want to create the person at first, but do not want to invite him/her as a user of the Robin Data ComplianceOS® yet, we recommend not to fill in the field email at first.
- In the main menu click on Organisational data: A dropdown menu opens.
- Move the mouse pointer over the menu item Organisation: Another dropdown menu opens.
- In the second dropdown menu click on Persons: The table view opens.
- Click on the button +Person: A quick start input mask opens in which the name can be recorded.
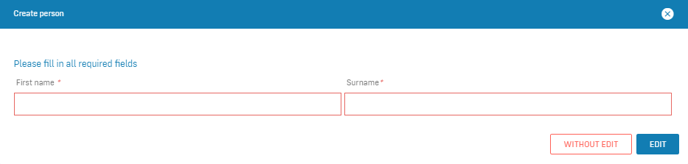
- Fill out the fields of the quick start input mask.
- Click on Edit: An empty input mask will open.
- Fill out the input mask.
- Click on Save: The person has been created.
Note
If you select Without edit in the quick start window, the person will be saved in the table view without any further details, and can be edited at a later time.
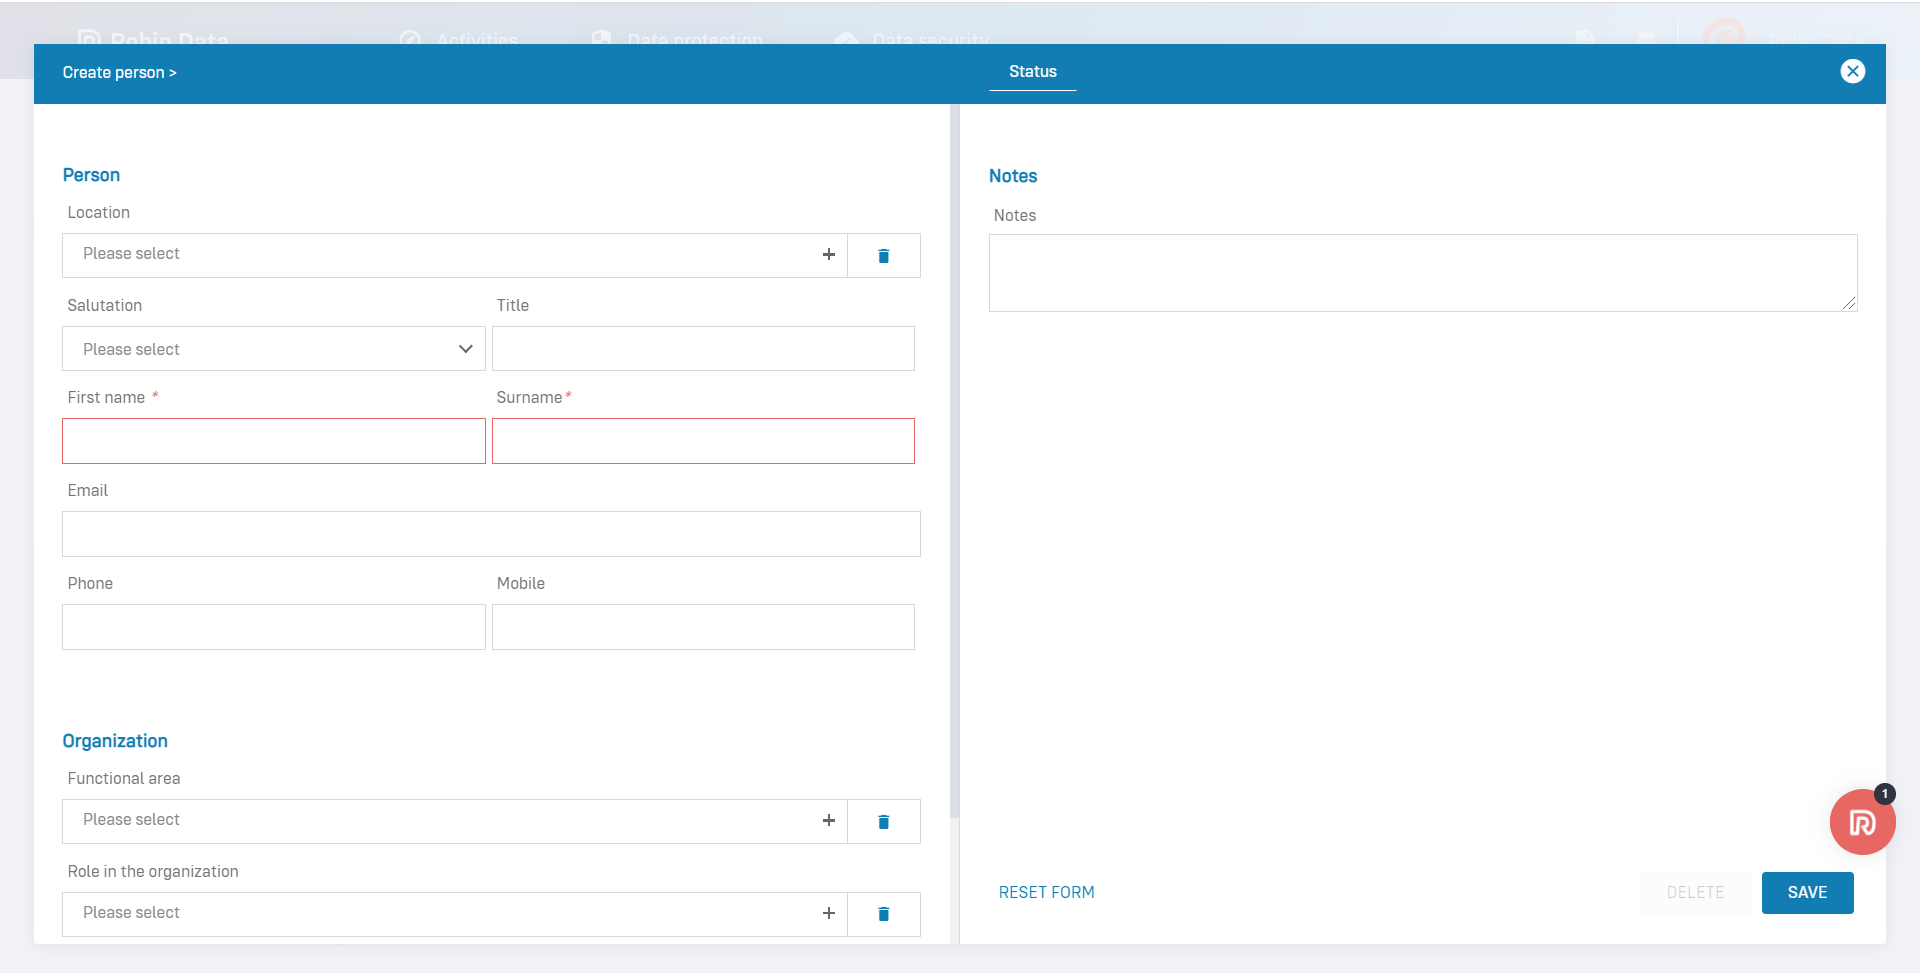
Data areas of the input mask
Click to enlarge image
The section on the left has the following data areas:
- Person: Maintenance of the person master data
- Organisation: Definition of the function and roles in the data protection organisation for this person.
Data area: Person
This data area has the following form fields:
- Location (mandatory field): Select the location where this person works according to the HR department.
- Salutation: Select the salutation of the person
- Title: Enter the title of the person (e.g. Prof. Dr.)
- First name (mandatory field): Enter the person's first name
- Surname (mandatory field): Enter the person's last name
- Email: Enter the person's work email.
- Phone: Enter the person's work landline number.
- Mobile: Enter the person's work mobile phone number
Data area: Organisation
This data area has the following form fields:- Functional area: enter the functional area (e.g., Sales, Human Resources) to which the person is assigned. This is used to make persons in the functional areas of the organisation co-responsible for parts of the data protection documentation. You can define this yourself.
- Role in the organisation: Specify the role person in the organisation. If this is usually part of the data protection organisation (see Background above), the following query box is set to "Yes".
- Part of the data protection organisation: Specify with "Yes" whether a person is part of the data protection organisation. All persons listed here with "Yes" will be displayed in the Data protection > Data protection organisation data area and can be edited there further, related to the specific data privacy organisation information.
The right pane has the following data areas:
- Matcher tab: You can use the matcher to link documents (such as activities or technical and organisational measures) and view linked documents. The matcher can be used to create additional documents that can be linked to the open document. For a more detailed explanation, see the article Use the matcher.
- Status tab: In this tab it is possible to manage the status of a document and to store notes about the person.
- Attachments tab: In this tab you can deposit related documents using the Add Attachment button.
- External links tab: In this tab you can link related information using the Add External Link button.
Data area: Status
This data area has the following form fields:
- Notes: Your notes on this person.
- Color coding of the document: Select color coding of the document. This is also displayed in the table. You can define color labels in Organisational data > Management-System > Content groups.
The general use of input masks with forms is explained in the article Input masks with forms.
Invite created persons as users
People already created at the sites can be invited as users of the Robin Data ComplianceOS®.
- In the main menu click on Organisational data: A dropdown menu opens.
- Move the mouse pointer over the menu item Organisation: Another dropdown menu opens.
- In the second dropdown menu click on Persons: The table view opens.
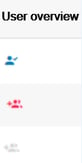
- In the User overview column click on the red button adding System User: The person has been invited as a user via email. For more information, see the article Manage users.
Tip: adding users from the table view
In the User overview column you will find icons with different backgrounds.
|
|
|
Related links
Further questions? - We are here for you.
If you have any questions about the software, please feel free to contact our support team. You can reach us at support@robin-data.io.