Content
Background
The user administration ensures that the administrator of your company can invite further users to use the software or remove users again.
Activities that are carried out by a user within the Robin Data software, such as changing data, creating new data or entering contracts, are traceable because they are marked with the name of the corresponding employee.
Create users
Depending on the license you have booked, you can add more users. On our website you can find an overview of our licenses, their prices and the included number of users. To add more users, please contact our support.
The user with the role "admin" or "company_admin" can create additional users.
- In the main menu click on your account name: A dropdown menu will open.
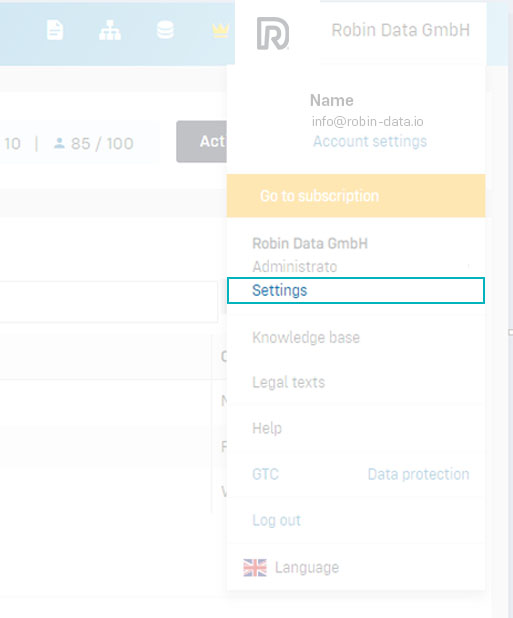
- In the dropdown menu click on Settings: The settings page will open.

- Click on the second tab User overview: The table with existing users will open.
- Click on the button +User overview: A modal window will open.
- Fill out the fields in the modal window.
- Click on Create to confirm your entry: The user will be created.
Data areas of this modal window
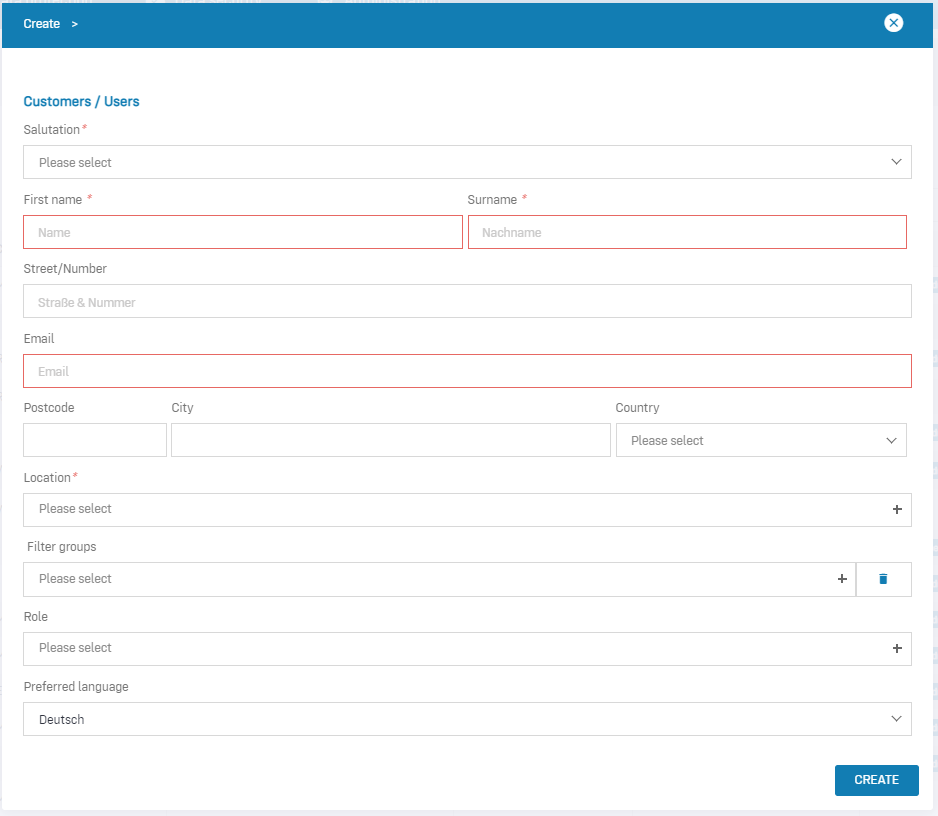
- Salutation: Select the person's salutation.
- First name: Enter the person's first name.
- Surname: Enter the person's last name.
- Email: Enter the person's work email. Refer to the note below to do this.
- Location: Select the location where this person works according to HR. If no location is listed in the drop-down menu, you must first create it under Data Protection > Locations.
Create user via e-mail address
Please use only lowercase letters when registering new users via their e-mail address. Technically, there may be difficulties in delivering the invitation if the spelling of the e-mail address contains a mixture of upper and lower case letters.
Receive invitation by email
Invited users will receive an invitation by email to the address used in the Robin Data Software when the user was created.
To confirm the invitation, invited users must click the activation link in the email and then enter a password. After that, the user will be logged into the Robin Data software.
Delete users
You can also delete already invited users from the user administration.
- Click on your account name in the main menu: A dropdown menu will open.
- Click on Settings in the dropdown menu: The settings page will open.
- Click on the second tab Users overview: The table with the created users will open.
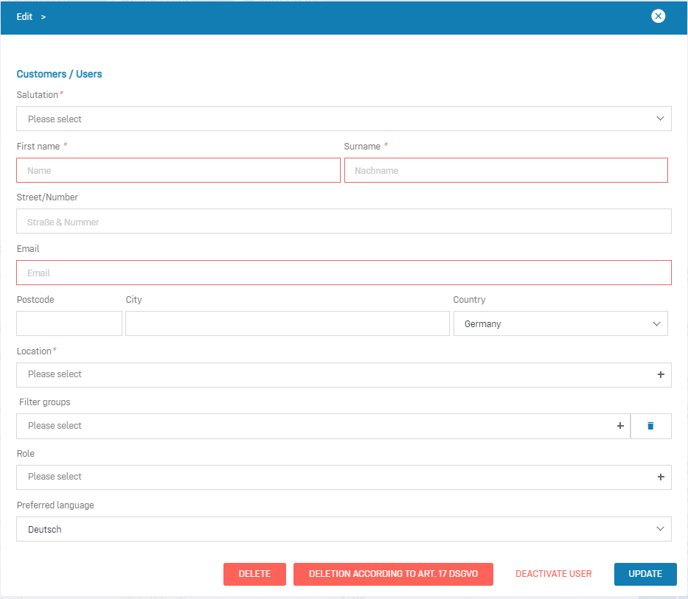
- Click on the first name of the user concerned: The editing mode of the selected user opens.
- You can either delete, deactivate, delete the user according to Art. 17 GDPR:
-
- Delete: The user will be deleted, but can be restored upon request.
- Delete according to Art. 17 DSGVO: The user will be irrevocably deleted, it is not possible to restore it. The deleted users are not listed under "Show deleted".
- Deactivate user: The user is deactivated, cannot log in afterwards, but still exists.
Invite deleted users again
Deleted or deactivated users can be re-invited to use Robin Data software.
- Click on your account name in the main menu: A drop-down menu will open.
- Click Settings in the drop-down menu: The settings page will open.
- Click on the second tab User overview: the table with the created users opens.
- Click on the Show deleted toggle: The toggle will turn blue and the deleted users will be displayed.

- Click on Invite user again next to the name of the user: A modal window will open.
- Click on Ok to confirm the invitation: The user will receive an invitation by email.
Assign the "Admin" role to users
Users who have the "company_admin" role can assign the Admin role to other users.
- In the main menu click on your account name: A dropdown menu will open.
- In the dropdown menu click on Settings: The settings page will open.
- Click on the second tab User overview: The table with existing users will open.
- Select a user: The edit mode of the selected user will open.
- Click on the input field under the category Role: A list with available roles will open.
- Select the Admin role: The role will appear in the input field.
- Click on the button Update: The edit mode will close and the corresponding user will be assigned the role of Admin.
Transfer the "Company Admin" role
Users who have the "company_admin" role can transfer it to other users.
Only users with the "Admin" role can be assigned the "Company Admin" role. To learn how to assign the Admin role, see Assigning the Admin role to users.
- In the main menu click on your account name: A dropdown menu will open.
- In the dropdown menu click on Settings: The settings page will open.
- Click on the second tab User overview: The table with existing users will open.
- Select a user: The edit mode of the selected user will open.
- Click on the button Transfer <Company Admin> Role: The window "Request to transfer the role <Company Admin>" will open.

- Click on the button Select the user to whom you want to transfer the role: A dropdown menu with all users assigned the role of " Admin" will open.
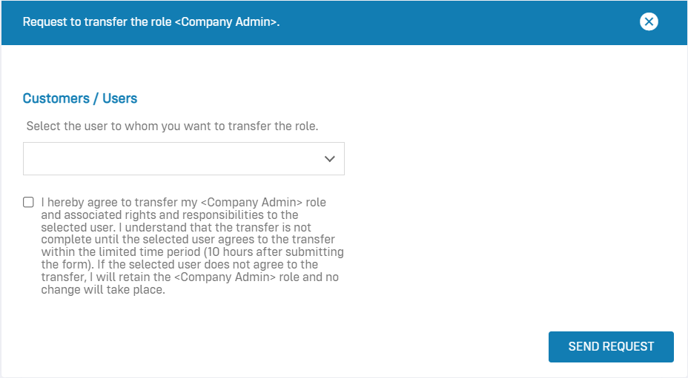
- Select a user: The user will appear in the input field.
- Click in the field with the statement to transfer the Company Admin role: a blue check mark will be set.
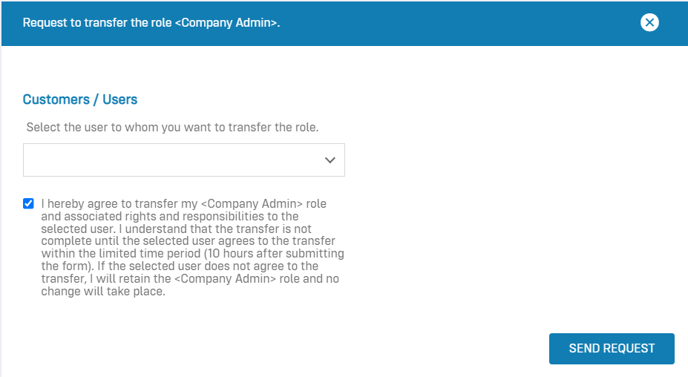
- Click on Anfrage absenden: The window "Anfrage zur Übertragung der Rolle "Cpmany Admin" will close.
- The user will receive an email with a request to accept the transfer of the "Company Admin" role.
Any other questions? - We are here for you.
If you have any questions about the software, please feel free to contact our support team. You can reach us at support@robin-data.io.