Content
Background
Content groups can be defined under the organisational data.
- Content groups combine different new or existing elements in Robin Data. For example, one could define a content group for all locations. This eliminates the need to add all locations individually to a record.
- When creating a content group, a type is secified so that the content group can be linked to records. The following types of content groups are available:
- Evaluation facotr
- Evaluation group
- Color schemes
- Filter views (tables)
- Form extensions
- Licensing standard texts
- Matching attributes
- Rights (beta)
- Standard
- By using the graph structure, the records linked in the content groups are implicitly assigned. In the coming updates, for example, a visualisation of the links of a dataset to other datasets will then be displayed. This allows you to build your own data structures and links between new and existing data sets in Robin Data. Currently, the application of the content groups is possible in the "Governance Tab" under the "Governance Tag" area.
Create content group
In this section you will learn the fundamental steps for creating a content group. The following sections explain how to create specific types of content groups and how to use them. The creation of a content group is done in 3 main steps:
1. Create content group category
- In the main menu click on the button Organisational data: A dropdown menu opens.
- Move the mouse pointer over the menu item Management System: Another dropdown menu opens.
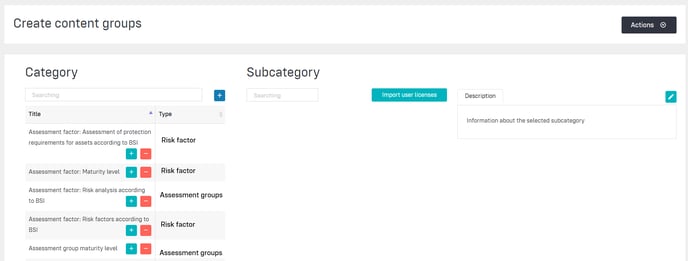
- In the second dropdown menu select Content groups: A new window opens.
- Click on the blue plus symbol in the category column: An empty input mask opens.

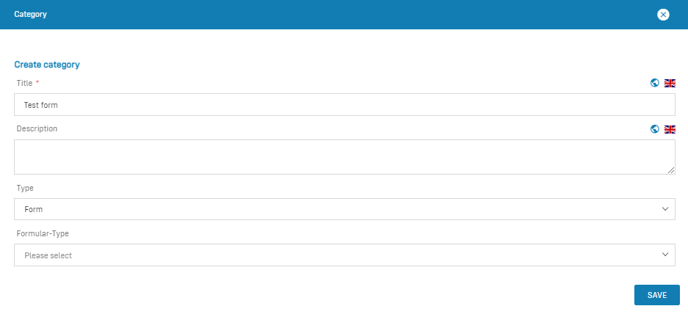
- Fill out the fields Title and Description.
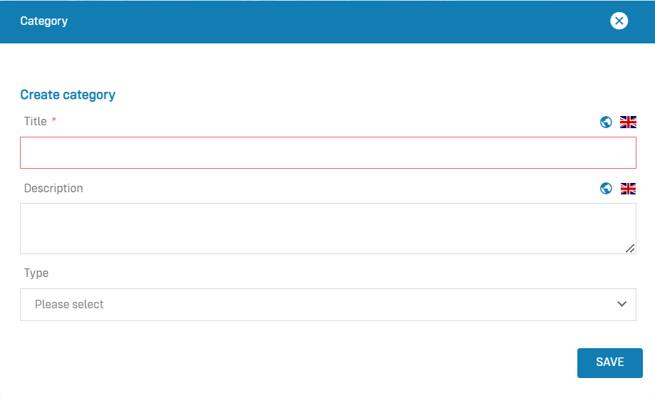
- In the field "Type" select a category type.
- Click on Save: The title of the content group appears in the category column and the category type appears in the type column.
2. Create content group subcategory
To assign content groups to records, users must create a subcategory.
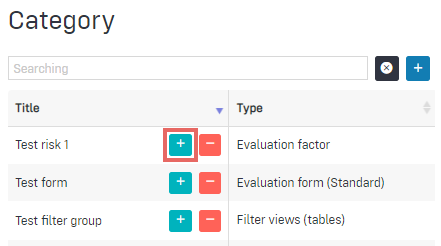
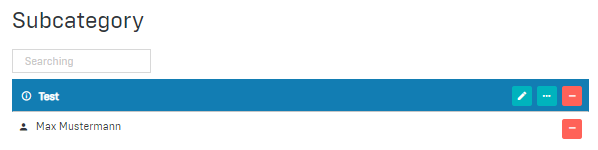
- Click on the green plus next to the category name: An input mask opens.
- Fill out the all required fields.
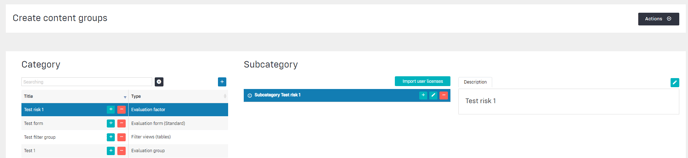
- Click on Save: The title is saved and appears in the subcategory column.
3. Assign data to subcategory
- To add data to the subcategory click on the plus icon: An input mask opens.
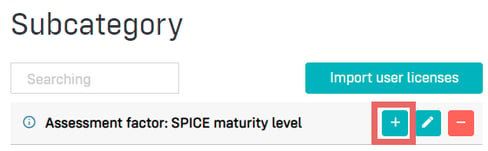
- Fill out the required fields.
- Click on Save: The data has been added to the subcategory
Create standard content group
- In the main menu click on Organisational data: A dropdown menu opens.
- Move the mouse pointer over the menu item Management System: Another dropdown menu opens.
- In the second dropdown menu click on Content groups: A new window opens.
- In the category table, create a content group category of the type Standard.
For a detailed description, see the section Create category. - Create a subcategory of the standard type content group.
For a detailed description, see the section Create subcategory. - Assign data to the subcategory by clicking on the green edit icon: Upon clicking, the buttons "static" and "dynamic" appear.
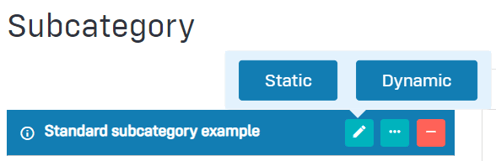
- Choose between static and dynamic data.
- Dynamic content: Select data that has already been defined in the organisational data.
- Static content: Create new records.
Create dynamic content
- Click on the green edit icon: The buttons "static" and "dynamic" appear.
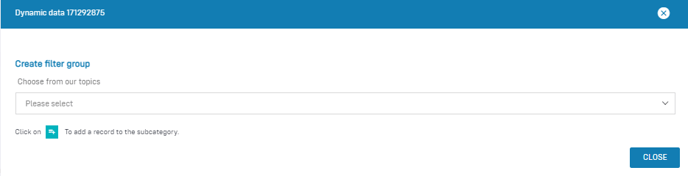
- Click on the button Dynamic: An input mask opens.
- Select a topic from the dropdown menu Choose from our topics: A list of available organisational data appears.
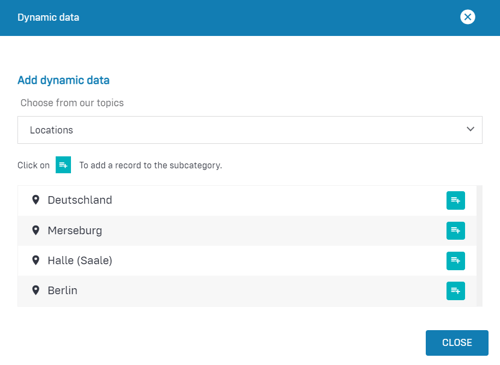
- Click on the green plus icon: The data will be added to the subcategory.
- Click on Close: The selected data is saved and appears below the subcategory.
Create static content
- Click on the green edit icon: The buttons "static" and "dynamic" appear.
- Click on the button Static: An input mask opens.
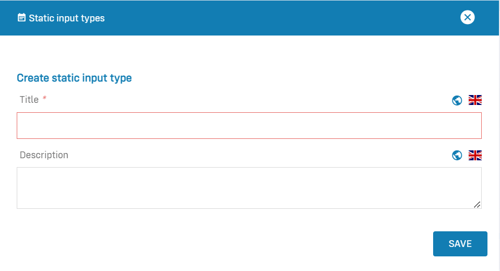
- Fill out the fields "title" and "description".
- Click on Save: The data is saved and appears below the subcategory.
Assign access rights
Access rights for users can be configured via content groups.
Only users with the role "admin" or "company admin" can define rights. Learn more about how to assign the role "admin" to a user in the article Manage users.
- In the main menu click on Organisational data: A dropdown menu opens.
- Move the mouse pointer over the menu item Management System: Another dropdown menu opens.
- In the second dropdown menu click on Content groups: A new window opens.
- In the area "category" create a content group of the type rights.
For a detailed description, see the section Create category.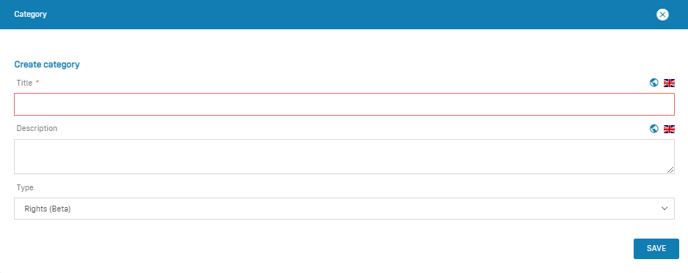
- Create a subcategory of the content group type "rights".
For a detailed description, see the section Create subcategory. - To define this rights group, click on the green edit icon: An input mask for the rights group opens.
- In the User field, select the respective user(s) whose rights you would like to define. In the lower part of the input mask you can select which menu items the user(s) may see, read or edit.
- Show/Hide: If the radio button is enabled, the selected user(s) will not be able to see the menu item.
- Read: If the radio button is enabled, the selected user(s) will be able to see but not edit the particular section.
- Read/Write: If the radio button is enabled, the selected user(s) will be able to see and edit the respective section.
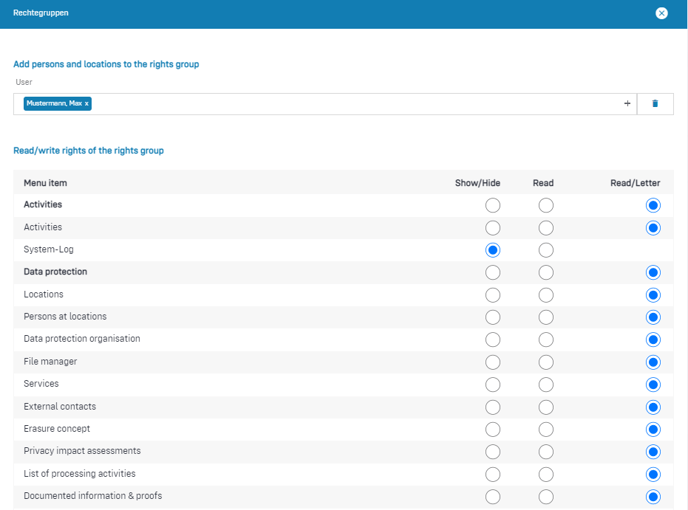
- Click on Save: The rights group becomes effective immediately.
Note
If you have stored a user in several rights groups with different access rights, the higher right will take effect.
Define filter views via content groups
Content groups of the type "filter views" can be used to define which documents users can access in the client, depending on their location or functional area. In this way, it can be set that employees of a department or location also only see the documents that are relevant for their department or location.
Filter views differ from rights in that rights can be used to control access to entire areas and functions of the software, whereas filter views can be used to control the visibility of documents.
Filter views affect all documents that can be assigned to a location and functional area (i.e. that contain the Governance tab). These are:
- Record of processing activities
- Erasure concept
- Data protection impact assessment
- External contacts
- Services & IT services
- Contracts with external contacts/records
- Technical-organisational measures
- Process & asset management (COS module)
- Risk management (COS module)
- Programs & controls (COS module)
Note
Only users with the role "admin" or "company admin" can define filter groups. A more detailed explanation of how to assign the role "admin" to users can be found in the article Assign the admin role to users.
- In the main menu click on Organisational data: A dropdown menu opens.
- Move the mouse pointer over the menu item Management System: Another dropdown menu opens.
- In the second dropdown menu click on Content groups: A new window opens.
- In the area "category" create a content group of the type filter view.
For a detailed description, see the section Create category.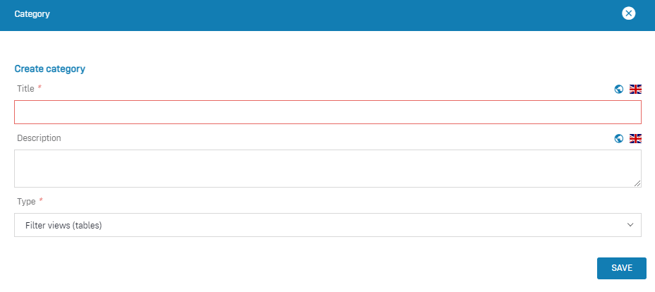
- Create a subcategory of the content group type "filter views".
For a detailed description, see the section Create subcategory.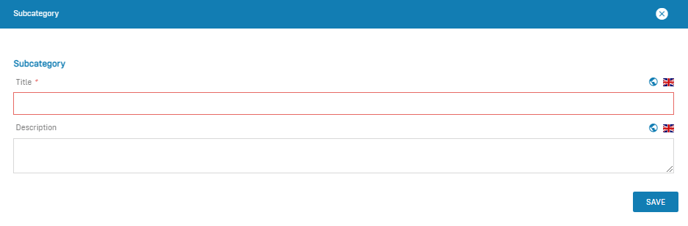
- Click on the green edit icon: An input mask for this filter group opens.

- In the field "choose from our topics" click on the option Users to select the respective user(s) whose filtered view you want to create: A list of existing users appears in the input mask.
- Click on the green plus icon next to the user's name to select the user whose view you want to filter: Selected users appear with a blue background.
- In the field "choose from our topics", select Locations or Functional areas to specify which documents the selected user(s) should have access to based on their filtered view.
- Click on the green plus icon to select locations / functional areas: Selected locations / functional areas are displayed with a blue background.
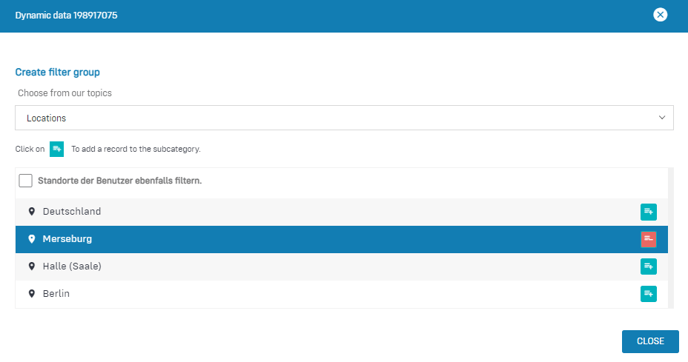
- Click on Close: The selected data appears under the subcategory. This filter takes effect immediately.
Note
If you have stored a user in several filter groups with different filter assignments, these will be added up.
Create standard evaluation forms
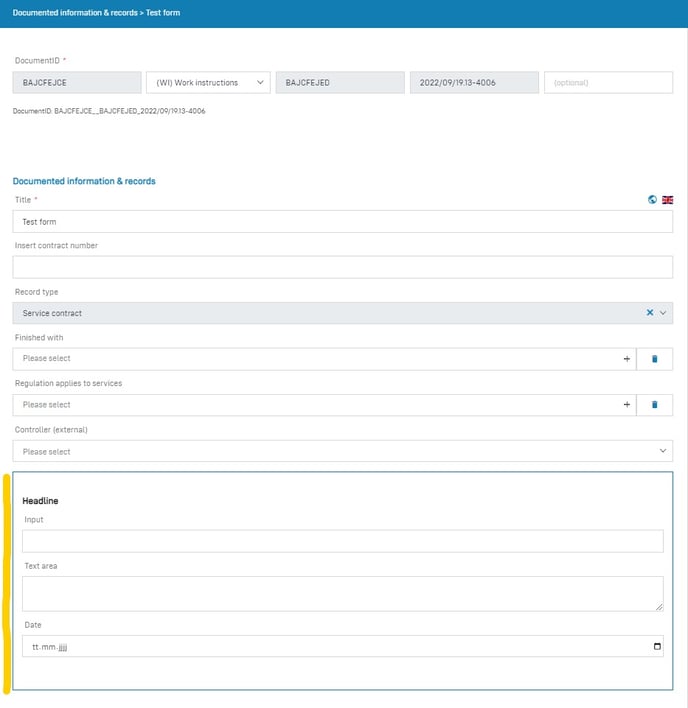
You can create your own forms via content groups. The forms appear as additional data fields in the lower area on the left side of a modal and can thus supplement Robin Data's form fields according to your needs.
Standard forms can be used in different documents:
- Documented information/records
- Assets (COS module)
- Risks (COS module)
- Controls (COS modules)
Note
Only users with the "admin" or "company admin" role can create forms. To learn how to assign the "admin" role, see the section Assign the admin role to users.
1. Create category "evaluation form (standard)"
- In the main menu click on Organisational data: A dropdown menu opens.
- Move the mouse pointer over the menu item Management System: Another dropdown menu opens.
- In the second dropdown menu click on Content groups: A new window opens.
- In the area "category" create a content group.
For a detailed description, see the section Create category. - In the selection field "type" select the option Form extensions: The selection field "form type" opens.
- Select the type Standard (Form).
- Click on Save: The name of the content group appears in the "Category" area.
2. Create subcategory of the content group "evaluation form (standard)"
- Create a subcategory of the content group type "filter views".
For a detailed description, see the section Create subcategory.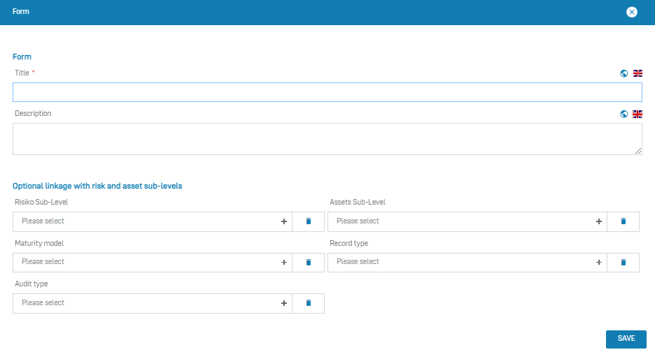
- Fill in the Title and Description fields.
- Select in which documents the form should be available.
- Risk Sub-Level: These forms can be automatically included in risks (COS module)
- Asset Sub-Level: These forms can be automatically included in assets (COS module)
- Maturity model: These forms can be automatically included in maturity models for controls (COS module)
- Record type: These forms can be automatically included documented information and evidence, for example. By selecting the Record type field, a dropdown menu opens from which record types can be selected. As soon as the record type is selected in documented information, the corresponding form fields appear below the Robin Data input fields on the left side of the input mask.

- Click on Save: The name of the form group appears in the "Subcategory" area.

3. Create individual form elements
- In the section subcategory, click on the green plus icon: An input mask for this filter group opens via which form elements can be added to the evaluation form.
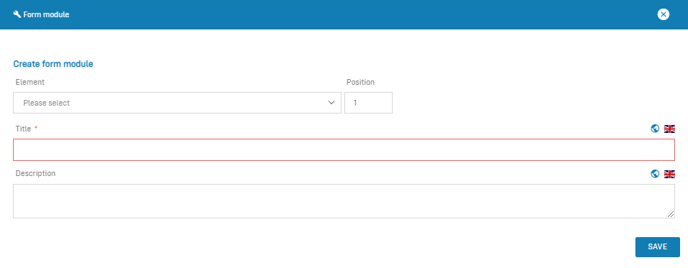
- In the field "element" select a form element type. The following elements are available for selection:
- Headline: Use this element to specify a headline for your form.
- Input Type Text: Use this element to insert a one-line text field into your form.
- Text Area: Use this element to insert a multiline text-field into your form.
- Input Type Date: Use this element to insert a date field into your form.
- Input Type Number: Use this element to insert a number field into your form.
- Horizontal Line: Use this element to insert a horizontal line into your form.
- In the field "position", specify where the element should appear in the form.
- Fill out the title field and, if necessary, the description field.
- Click on Save: The form element appears in the subcategory area. The form will be immediately visible in the input mask of linked documents.
- Repeat steps 1 - 5 to create more form elements.
Note:
The fields of the standard forms are not visible in the result tables, but are only visible by opening the modal.
Create matching attributes via content groups
So-called matching attributes can be created via content groups, which make it possible to provide additional information to the link when matching two data records. After configuring the matching attributes via the content groups, attributes can be maintained when linking two data records and appear as additional information in the visualization of both linked data records.
Only users with the "admin" or "company admin" role can matching attributes. To learn how to assign the "admin" role, see the section Assign the admin role to users.
Create matching attribute
- In the category table, create a content group category of the type Matching attributes.
For a detailed description, see the section Create category. - Create a subcategory of the matching attributes content group: An input mask opens.
For a detailed description, see the section Create subcategory.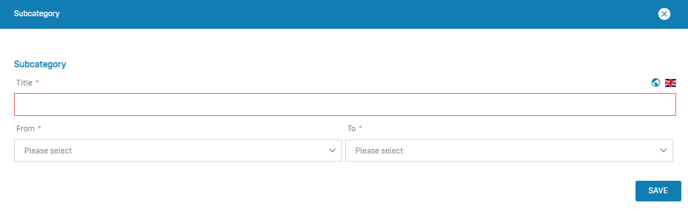
- Fill out the field title.
- Select for which data links the attributes should be available. The order does not matter, because the matchings are always bidirectional.
- From: Select from which document type the matching should take place.
- To: Select to which document type the matching should take place.
- Click on Save: The title of the content group will appear in the area "Subcategory"
- Click on the green plus symbol next to the name of the subcategory you have created: An input mask opens in which you can define these matching attributes.
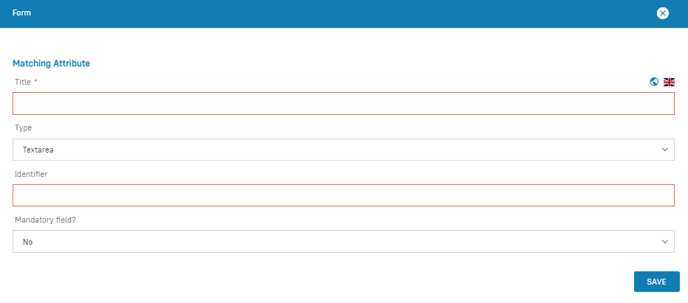
- You can now assign the attributes one after the other for your matching:
- Title: Define which designation the attribute should receive. The designation will appear later as the label of the first attribute when matching the records.
- Type: Select whether the attribute should be a text field or a yes/no information.
Textarea: Use this element to insert a multiline free text attribute field into your matching. - Identifier: Use this element to insert a yes/no question into your matching.
Identifier: Assign an identifier. The identifier uniquely identifies this attribute in our system. - Mandatory field: Specify whether this attribute must be filled in during matching or is optional.
- Click on Save: The attribute is created. The selected data will appear below this subcategory. The attributes will be immediately visible in the matcher tab of the respective data, as soon as you the two records have been linked via the matcher tab.
- Repeat steps 6 - 8 to create additional matching attributes.
Additional questions? - We are here for you
If you have any questions about the software, please feel free to contact our support. You can reach us at support@robin-data.io.