Background
In data protection, many documents are created that must be documented in the data protection management system. These documents can often be used for all locations of an organisation or are only relevant for some locations of the organisation.
In the File Manager, you can therefore upload and manage documents as files for specific sites.
Currently, you can upload the following file types:
- PDF files (.pdf)
- Text files (.txt)
- Rich Text files (.rtf)
- Word files (.doc / docx.)
- Word template (.dot /.dotx)
- Excel files (.xls /.xlsx)
- PowerPoint (.ppt / .pptx)
- Open Office files (.odt /.ods / .odp,)
- Photos (.jpg / .jpeg / .png )
All other file types are blocked for upload. If you have any concerns in this context, please contact us at: support@robin-data.io.
Manage uploaded files
- In the main menu click on Data protection: A dropdown menu opens.
- In the dropdown menu click on File Manager: The table view opens.
The general functionality of the Table View is described in the article Using Table View. In the table view you can see the overview of the currently already uploaded files.
Upload files
File name requirement
If the records selected for upload contain certain special characters, they cannot be imported. Please read the following notes on naming datasets:
- File names may contain spaces, these will automatically be changed to an underscore in the file name upon upload
- File names may contain a maximum of 90 characters including file extension
- Only the following characters and numbers may be used in the file name:
- All letters of the German alphabet except umlauts ä, ö, ü and ß (e.g. 01_Oeffentlicher_Dienst).
- All digits (e.g. 02_Appendix_K1 and 03_Appendix_K2)
- The underscore _ and minus - characters (e.g. 04_Attachment_K1 and 04_Attachment_K2)
- Dots ( . ) when file names are separated from file extensions (e.g. 05_Massnahmen.docx)
- In the main menu click on Activities: A dropdown menu opens.
- In the dropdown menu click on File Manager: The table view opens,
- Select the button +File Manager: An input mask opens.
- Fill out the fields of the input mask.
- Click on Save: The file has been uploaded.
Data areas of the input mask
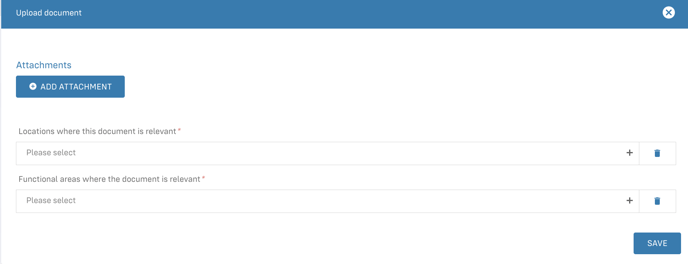
The data area of the input mask has the following fields:
- Select Locations: Select one or more locations to which this document applies
- Select Functional Area: Select one or more functional areas to which this document applies.
- Button Add attachment: After clicking the button, the file manager of your operating system opens (e.g. Windows Explorer or OSX Finder). Select the document to be uploaded and confirm with "Ok". Please note the restrictions on the permitted file attachments listed above. The name of the document is displayed above the button.
Download or delete files
Once files have been uploaded you can download or delete files in the table view.
Note
The icons only appear in the line of the respective file after it has been uploaded.
In the column Settings you will find two symbols:
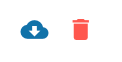
These have the following functions:
- Blue cloud: Download the document in the selected row
- Red trash can: Delete the document in the selected row
Further questions? - We are here for you.
If you have any questions about the software, please contact our support team. You can reach us at support@robin-data.io.